A developing book made of fabric is an interesting and useful gift for a baby. It is not at all necessary to buy it for a lot of money, you can make it yourself. To do this, you do not need to be a professional seamstress or an enthusiastic needlewoman, it is very easy to sew such a thing yourself.

About the benefits of educational fabric books for children
Cloth books are also often called quiet, because while the baby is busy "reading", there is peace and quiet at home.
Such a book is able to captivate the baby for quite a long time, which the mother can devote to herself or to homework.
Such books, unlike cardboard or paper, can be crumpled, twisted, chewed, wet - absolutely nothing will happen to them. If necessary, they can be washed and ironed, and the book will serve for a long time.
For sewing books, they use various fabrics, such as fur, felt or various fillers, for example, cereals, rustling candy wrappers, bells. This contributes to the development of the baby's tactile sensations.
Thanks to the many details, such as lacing, basswood, zippers, buttons, buttons and others, a cloth book promotes the development of fine motor skills and teaches the child to be independent. In the future, the baby can easily button up a jacket, shirt, tie a knot, etc.
The content of the book can be free, when each page absolutely does not repeat the theme of the previous one, or thematic.
With the help of this wonderful educational toy you can learn colors, counting, letters, seasons, the concepts of "day-night", "big-small", geometric shapes and much more. Everything here will depend only on your imagination.
You can take such a sensory book with you wherever you go, and the child will be busy with useful business when it is necessary to behave calmly.
At what age should you use it?
Fabric books should be made according to the age of your child:
- Children under 1 year old can only be offered options in which there are no small fastening parts.
- Starting at 1 year old, you can already place large parts on the pages that can be removed and attached back, for example, on linden trees.
- At the age of three, the content of the pages may expand. There are already a lot more different fasteners and fasteners, simple games that can be played together, role-playing games in the form of a fairy tale, may appear in the plot of the book.
- Older preschool children will like the more complex option that develops logical thinking. Here you can place a finger theater based on a specific fairy tale or cartoon, complicated games and tasks.
Materials
Natural materials are used for sewing children's books from fabric - felt, fur, leather, woolen threads, chintz, silk, flax, etc.
It is better to choose bright colors (red, blue, green, purple, white, black, etc.), they are more attractive to children, especially young children.
Make sure the color of the plot matches reality. For example, a dog cannot be blue and the sea cannot be yellow.
Choose the right pattern on the fabric. If the balloons can be "in a flower" or "pea", then for a spruce you need a solid green fabric, the pattern in this case will be inappropriate.
You may also need:
- cardboard;
- synthetic winterizer;
- cotton wool;
- threads of various thickness;
- ribbons of different colors and widths;
- different types of fasteners - basswood, magnetic buttons, zippers, buttons, etc.
- fabric applications;
- beads;
- laces of different colors;
- rustling candy wrappers;
- cereals;
- small pebbles;
- bells.
Your imagination, shown when creating the layout of each page, will tell you what else you need to purchase.
For information on what materials can be used for sewing educational books, see the next video.
How to get started?
Before you start sewing a book for your baby, you need:
- Think over the number of pages.
- Show your imagination and work out in detail the plot of each page;
- Think about what each spread of the book will teach the crumb, and what elements are needed for this.
- Choose the shape and size of your future book. The simplest shapes to sew are a square or rectangle. For those who have sewing skills and are confident in their abilities, you can choose more complicated shapes - this is a circle, an oval, a boat, a flower, a sun - it depends on your imagination, sewing skills, the thematic content of the book.
- Decide how the pages will be attached to each other - you can attach them to ribbons, strips of felt, using rings or laces. The most convenient size is approximately 20 cm wide and 25 cm long.
On small pages, you will not be able to place all the material that you would like, and looking at large pages, the child will get lost, get tired quickly, and attention will be scattered.


- Pick up or draw on your own patterns that you need. There is no need to look for any specific patterns for your book, you can even use children's coloring pages.
- Calculate how much material and various decorative elements you will need for sewing. Get everything you need.
- Take free time to create a unique book for your beloved child.


Step by step guide and basic principles
The principles of sewing books from fabric are the same, only the content of the pages changes:
- In order to sew the pages, you will need to cut them out of fabric and sew on three sides (in case you chose a square or rectangular shape).
- Next, we fill the resulting pocket with material for sealing - it can be thick cardboard, foam rubber or synthetic winterizer - and sew up the pocket.
- It is more convenient to design pages and covers until you have sewn a pocket, that is, on the felt cut out for the page. On it you sew on appliqués and various details in accordance with your idea.


- At the stage of decorating, fix various accessories, ribbons. Then two sheets of felt are sewn together so that the wrong side is hidden.
- The book cover sewing algorithm is approximately the same. The difference is that you need to leave a margin of felt for the spine, the size of which depends on the thickness and how many pages you make. Do not forget that the cover should be thicker than the pages. To do this, if you are sewing a book from felt, it can be folded in half.


Master Class
We offer you a master class on sewing a simple book.
You will need:
- 11 sheets of felt measuring 20 * 20 cm for sewing pages and 20 sheets of 15 * 15 cm for details;
- needles and threads, the color of which should be matched to the page and details, pins;
- magnetic buttons - 5 pcs;
- buttons for decoration (butterflies, birds) - 10 pcs. It is better to choose buttons made from natural materials, such as wood.
- 6 beads, black and white;
- 2 white flat buttons and 6 pcs black;
- a hat gum will need 1 m of black and 1 m of purple;
- 50 cm black and 50 cm white Velcro tape;
- simple buttons - 4 pcs;
- 20 grams of holofiber as a filler or you can use a synthetic winterizer;
- 15 cm of regular rep tape;
- 1 m each of blue, white and blue zigzag rep ribbons;
- zipper: 15 cm and 20 cm.

Here are approximate calculations for sewing a sample book. It is better if you have the necessary materials with a small supply (felt, ribbons, Velcro, holofiber). Depending on your desire or the availability of the necessary materials in stores, you can easily change them.
Use the above algorithm to sew pages. In this case, it does not change. The seams can be sewn by hand or with a sewing machine.
The elements attached to the pages are sewn separately.
If you sew with your hands, then choose a seam "forward with a needle" for removable elements, for elements that will be sewn - "behind a needle", and for processing pages a "looped" seam.

When sewing elements on a linden, it is better to sew the part with hooks on removable parts, and the soft part of the linden - to the page itself. It will be much more convenient to use the book, because if the book is closed without removable parts, its pages will remain intact.

If you want to make the pages stiffer, you can use thick cardboard or tarpaulin rather than padding polyester. We will fasten the pages to each other using felt, cutting it into strips. The patterns in this version are very simple, we draw them by hand.
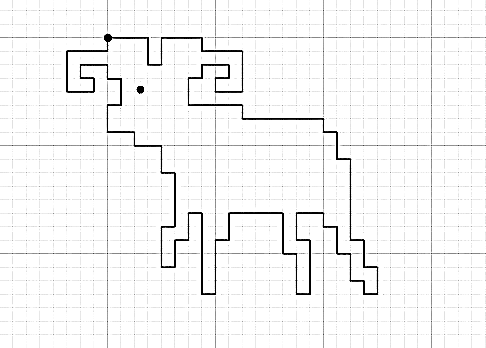
The first cover of the book will look like this. On it we have an inscription and a cute lamb, as well as a button for fastening a book.

On the first page, we have a flower and ladybirds, which are attached to it using magnetic buttons. Use this page to learn colors with your baby. It is also well suited for consolidating the skills of counting from 1 to 5.
You can count how many ladybirds have sat on a flower, or you can count how old a ladybug is by the specks on the back.

A large ladybug has settled on the second page. Its wings are connected with a zipper, and under them is a pocket where you can fold the ladybirds from the previous page.

A beautiful apple tree grows on the third page. With the help of linden, flowers or apples are attached to it. This apple tree will help you learn the stages of development of trees and the seasons (spring, summer) with your child. You can complicate this page if you first make a large pocket where you will fold the removable elements, and only sew on the trunk and bare branches on top of it, the foliage will also be attached with the help of linden.
In this case, you will need two options for the crown of the tree - spring and autumn.
This will expand the development capabilities of this page. In the spring, green foliage and flowers will appear on the apple tree, in summer apples will grow instead of flowers, in the fall the foliage will change its color to yellow, and by winter it will fall off.

On the next page we will put a cheerful hedgehog harvesting. With the help of Velcro, you can attach mushrooms or apples from an apple tree to its needles.

Next, we devote two pages to marine topics. On one we will settle sea inhabitants, who are attached to it with simple buttons. This is a sorter page for finding marine shadows.
On the second, a jellyfish will swim in the sea. Instead of tentacles, we sew colorful ribbons and beads on a rubber band on the hat. We sew the sea in the form of a pocket and we can release the residents into it, with whom it is worth introducing the child before that.

On the cover we make a pocket with a zipper for removable elements and embroider the outline of the pyramid on top. We sew the details of the pyramid separately and attach them to the contours using linden.

An interesting book for your kid is ready! She will surely become one of his favorite toys, because she was made by his beloved mom!


