Perhaps all mothers have heard about the pedagogical system of the wonderful Italian doctor. Many parents do not mind introducing some developmental principles into their own educational process, however, not every family will be able to purchase real Montessori toys. Is this a reason to abandon the Montessori system at home? Not at all. After all, many developmental manuals can be made independently, as they say, from scrap materials. In addition, daily classes can be organized if desired.
Perhaps all mothers have heard about the pedagogical system of the wonderful Italian doctor. Many parents do not mind introducing some developmental principles into their own educational process, however, not every family will be able to purchase real Montessori toys.
Is this a reason to abandon the Montessori system at home? Not at all. In addition, daily classes can be organized if desired.
The most important thing is to understand how to create a developing environment, how to divide the children's room into main zones, what materials to choose for a child of a certain age. Experienced specialists and mothers will help to understand these issues.
A very useful and informative article by a child psychologist will tell you about what the Montessori method is, what are the principles of this educational system and what are the main pros and cons of this method.
Rules for arranging a developing space
Equipping a nursery in accordance with the Montessori rules is not as difficult as it might seem to an inexperienced parent. Undoubtedly, the premises in the kindergarten or classrooms at the school are quite spacious, however, a Montessori-style room can turn out from a small nursery.
When organizing a home developmental environment, it is important to observe the following rules:
- the child must see all the materials for classes, that is, they must be located in the reach;
- furniture should be suitable for the baby in height and should be light in weight so that the child can independently move or install a chair and a table anywhere;
- a rug or a blanket should be laid on the floor, since the child will definitely play and practice not only on the table, but also next to it;
- all shelves and racks with play aids should be “welcoming open” so that the kid can choose the desired item by himself;
- any individual task must be located and offered in its tray, box or plastic container;
- every item used by a child should be real, and not a fake or a toy (that is, the baby should be given, for example, a real scoop and a broom).
This order in the organization of the play space not only helps the kid to navigate the materials and manuals from an early age, but also allows to teach cleanliness even to a very young child. Played? Clean up after you, put the item in its place!
Room zoning
The Montessori system implies a clear zoning of space. The created training sections must be filled with suitable material.
The principle of dividing the room, by the way, is very often used by teachers in early childhood development centers. There are five main zones, each of them is characterized by certain features.
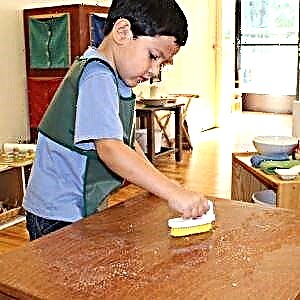
Practical skills zone
Studying in this section, the kid will be able to acquire basic self-care skills. The fullness of the zone, of course, largely depends on the age of the child. The general list of didactic materials for the formation of practical skills includes:
 a decanter of water and a mug (so that the child can quench his thirst on his own);
- a bowl of water and a sponge;
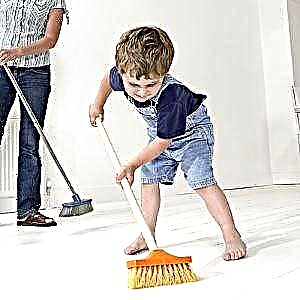
- broom and scoop for cleaning;
- buttons and a needle;
- shoe cleaning products;
- flowers in pots and a watering can;
- spray bottle and sponge;
- boards with various locks, zippers, latches, lacing, switches, etc.
 a decanter of water and a mug (so that the child can quench his thirst on his own);
Montessori promoted the independent development of the child. Therefore, the mother should not particularly interfere in the course of the lesson, it is only important to monitor children's safety and prevent damage to household items.
Sensory development zone
Improving sensing is especially important for the youngest children. Objects are placed in this section that are designed to develop the perception of shape, color, weight, auditory, visual, tactile sensations.
Examples of didactic materials are:
 liners;
- bumpy balls;
- sensory sacs of Montessori;
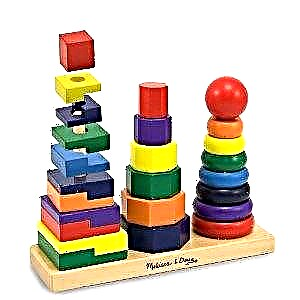
- pyramids;
- matryoshka;
- flaps with fabrics of various textures;
- bags with different fragrant fillers;
- plastic bottles with peas, cereals, salt, etc.
 liners;
For a 1-year-old child, you can put a developing mat in this zone, which has remained from the previous time. From this gaming accessory, you should only remove arcs and other unnecessary elements.
Mathematics zone
Classes in mathematics using the Montessori method involves the presence in a special area of objects that will help teach the child the simplest arithmetic operations, comparing sizes, shapes and numbers. It also lays the foundations for abstract thinking.
The following materials are designed to cope with such tasks:
 counting sticks;
- sets of geometric figures;
- numbers with a rough surface;
- abacus made of wood or plastic;
- flashcards with simple algebraic problems;
- beads or chips;
- digital lotto;
- ordinary nesting dolls and pyramids.
 counting sticks;
Rough numbers can be made in a variety of ways. For example, they can be cut from sandpaper of various grain sizes, from thick cardboard, on which an unusual embossed surface is created with the help of glue and semolina.
Language zone
In this training section are placed those manuals that are designed to teach children to read and write. Language didactic materials can be very different, the most common are:
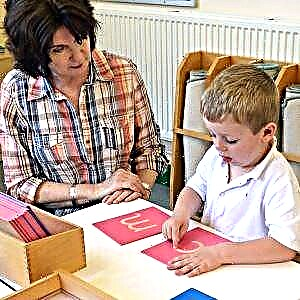 letter and syllable cash registers;
- voluminous and rough letters;
- cubes;
- recipe;
- pencils with an album;
- a tray of semolina for finger exercises;
- various cards with words;
- speech lotto;
- children's fiction.
 letter and syllable cash registers;
The rough letters are made in exactly the same way as the numbers for the math zone. This also includes classes for the development of fine motor skills, since they all contribute to the speedy improvement of speech and writing.
Space zone
In another way, this section is also called the natural science zone, that is, here the child learns all the diversity of the world around him, gets acquainted with natural phenomena, the history and culture of his homeland and other countries of the world.
 Experts and experienced parents advise placing such aids and items in the space zone as:
- home flowers;
- aquarium;
- various maps and a globe;
- a set of animals (figurines of wild, domestic animals, birds);
- herbarium;
- mini-laboratory for experiments;
- shells, sea and river stones;
- bingo with animals and similar games;
- calendar of observation of natural phenomena;
- various thematic encyclopedias, etc.
All of these five sections can be freely positioned even in a small room. It is only important to arrange their contents and open up free access for the baby.
In addition, it is recommended to periodically revise the developmental materials and remove the benefits that are boring to the child or are not suitable for his age.
Also, one should not be overly fanatical about the Montessori principle concerning the independent cognition of the world by a child. Certain activities involve the complicity of the parents - for example, it will be difficult for a child to play lotto alone.
Do not forget about the age factor. Because not a single, even the most unique, educational aid will bring obvious benefits if the child is too young or has already grown up for a toy.
Activities and materials for children under 1 year old
First of all, the Montessori technique is intended for children over 3 years old, however, some of its principles can be implemented at a much earlier age.
The best educational games for children under one year old, presented in the article by a child psychologist, will help parents develop their small child even more successfully.
It is necessary to equip the children's room in such a way that the baby can move freely. To do this, lay a soft mat or mattress on the floor, and install a mirror next to it (it must be fixed).
Closer to 12 months of age, a crossbar should be installed near the mirror so that the child can gradually get up and, adhering, move in an upright position.
As for didactic materials, the principle works during this age period - the more sensing, the more useful it is for the baby.

It is necessary to choose such items that you can:
- touch;
- listen;
- transfer from handle to handle.
Up to one year old, a child may need several important benefits, which are usually found in every home where a newborn baby settles.
- mobiles. For the development of visual perception in a baby under 1 month old, a mobile with black and white images and toys is useful. Then you can take pendants with items of basic shades;
- noisy toys. You can take traditional rattles, bells, and other musical instruments. DIY noisy toys are also a good option. For manufacturing, you will need bottles, boxes, jars in which pebbles, cereals are poured;
- grab toys. A 3 month old is actively learning to grab objects. For this purpose, he is offered sticks made of wood, plastic, which are convenient to hold and shift from palm to palm;
- boxes with small items. To improve tactile sensations and expand knowledge about the world around you, a box with various small objects of different texture is useful. The parent must make sure that the baby does not drag them into his mouth.
All such exercises can and should be accompanied by children's songs, nursery rhymes, rhymes. You can also include classical pieces of music.
Classes and materials from one to two years
A one-year-old baby not only needs the development of sensing, but also the training of fine motor skills, which leads to speech. To this end, you can make the recommended Montessori materials yourself at home.
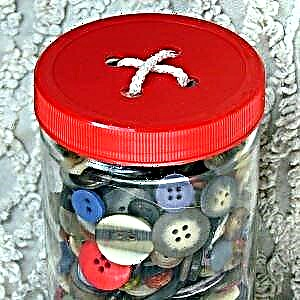 "Magic Jars". We put beans, peas, buttons in the bottles and invite the child to make some noise first, and then open the jar to satisfy the interest.
- "Feeding". We cut through the mouth of an unnecessary plastic toy and let the baby feed it with peas, beads or beans. This will help train your motor skills and eyes.
- "Secret". A 1 year old child loves to find hidden objects. In a bowl with semolina or other cereals, you can "drip" a shell, a small toy, a lump. Naturally, the lesson takes place under parental control.
- "Modeling". A kid older than 1 year old needs to be introduced to plasticine or salt dough. The baby is already capable of making cakes, balls, sausages. Together with the parents, you can even make various figures, additionally decorating them with various elements (matches, toothpicks).
- "Vodichka". On a large tray, you need to put dishes of different sizes. The child can pour water from one to another. In addition, sponges are dipped into the liquid, pebbles, shells, toys are taken from the bottom.
- "Picture". At home, you can organize a whole art studio. To do this, you need to print a simple drawing with a minimum amount of details, glue certain areas of the image with glue and invite the baby to stick pieces of colored paper.
 "Magic Jars". We put beans, peas, buttons in the bottles and invite the child to make some noise first, and then open the jar to satisfy the interest.
You can also make toys at home that resemble the standard Maria Montessori sets. As a rule, laces are suitable for children over 1 year old, which can look completely different. The easiest option is to "lacing" the colander.
Also at this age, pyramids with large rings and nesting dolls are suitable. Usually, children are happy to put circles on a pyramid pin and disassemble and assemble wooden dolls, simultaneously improving their perception of shape and size.
Activities and materials for children 2 to 3 years old
Montessori classes at home are based on exactly the same principles as in specialized kindergartens. Therefore, an adult should gradually become an observer, not an initiator of activities.
Children over two years old tend to strive for independent knowledge of the world around them. In addition, they really like this process. The task of parents is not to impose toys, but to provide an opportunity to manipulate objects.
- design. It is not necessary to buy LEGO, you can make your own constructor from improvised elements. For this, stones, shells, rags, laces, shells, planks will fit. The child himself must decide how to combine them and which of them can be constructed;
- collecting puzzles. Every family keeps old postcards, thick pictures. They can be cut into 2 - 4 pieces (the older the baby, the more elements). Initially, the parent still needs to demonstrate how to assemble the puzzle. Usually children are happy to play a similar game;
- sorting. It is important to teach your child that you need to put some items in one box, and others, respectively, in another. This helps to understand the principle of sorting objects according to any criteria: color, shape, size, quantity, etc.
You can also offer your kid toys like "Mailbox" when it is necessary to push the corresponding figures into the slot of a certain shape. This game captivates children of this age for a long time.
Classes and materials from 3 to 6 years old
Children in this age period become even more independent, especially after passing through the so-called crisis of three years. Now the preschooler seeks to gain new knowledge through third-party sources of information, for example, books.
Favorite and least favorite activities
After the age of three, the child is no longer so actively interested in “surrogate” everyday activities, so the area of practical skills can be gradually reduced.
The kid is already ready physically and psychologically to do real housework, for example:
 take care of yourself (these actions include not just brushing your teeth, washing your hands, but participating in cooking dinner, washing dishes, setting the table);
- clean the apartment (now the child is ready to sweep, mop the floor, wipe dust, take care of a pet or a favorite plant).
 take care of yourself (these actions include not just brushing your teeth, washing your hands, but participating in cooking dinner, washing dishes, setting the table);
Sensory theory fades into the background, and active work with materials comes to the fore. For example, children are very happy to work with kinetic sand (it is more flexible than ordinary sand).
Find out more information about what kinetic sand is and what games can be played with this plastic material in this article by a child psychologist.
In a children's sandbox, a child can:
- mix different shades;
- to sculpt not just Easter cakes, but real "works of art";
- compare the created figures in size, color and shape;
- hide and search for treasures;
- create letters and numbers from sand, etc.
The usual noise jars are no longer relevant, now you need to give preference to children's musical instruments: drums, pipes and even synthesizers.
If the child enjoys playing with toys for younger children, you should not take and give those that seem more correct to you.Montessori assumed that the kid himself should choose an interesting activity.
Writing and reading
A 4 - 5 year old child is actively interested in writing letters. Should you teach your kid to write yourself? Experts advise preparing your hands and fingers to master this skill.
Such tasks will cope with this task as:
- hatching;
- drawing letters on semolina or kinetic sand;
- work in writing;
- cutting with scissors;
- stringing large beads on a fishing line.

Six years is the standard age for learning to read. The following Montessori exercises will help you prepare to master this skill:
- exercises to identify sounds (for example, a parent invites the child to find in the room those objects that begin with the sound "p");
- working with small signed items that are stored in one box;
- work with cards that include the image and its name (it is important that the letters are pronounced the same way as they were written);
- reading small books with large illustrations and small accompanying text.
The enthusiasm for math studies also increases. The Montessori technique is distinguished by certain manuals for the formation of these skills. However, at home, you can also find suitable exercises and aids.
The main task of parents is to show how you can combine the visual image of a number with its name. For example, if you want your child to remember - 3 + 3 = 6, you need to put a card with numbers and the required number of beads or tokens next to it.
You can expand knowledge about the world around you while walking. A child walking in the park can collect leaves and plants in order to create a herbarium later. Also, the six-year-old is already able to photograph the animals that he saw in the zoo to create his own filing cabinet.
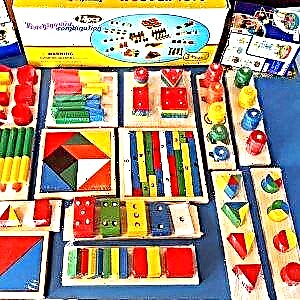
DIY Montessori materials
The child grows very quickly, so he constantly needs more and more new play accessories. Of course, Montessori manuals can be purchased at any specialty store, but they are quite expensive, and it is also much more interesting to make them on your own.
Mom will be able to save significant money, because such benefits are often made from waste materials that are usually simply thrown into the trash.
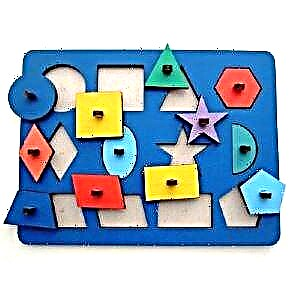
Inlay frames
So that the child can understand what geometric shapes are, remember the main shades, master the gradation of sizes, you can make simple insert frames.
For manufacturing you need to take:
 rigid or corrugated cardboard;
- paper sheet (Whatman paper or a sheet from a regular album);
- colored or self-adhesive paper;
- beads or buttons;
- wire.
 rigid or corrugated cardboard;
The algorithm for making the manual is as follows:
- Cut the cardboard into rectangles. Their number depends on the number of geometric shapes with which the mother wants to introduce her child. For a baby of 1 - 2 years old, four basic shapes are enough: a circle, a square, a rectangle and a triangle.
- In a rectangular figure, it is necessary to cut out certain silhouettes (squares, triangles), and at first the largest is cut, then the smaller and even smaller.
- The resulting inserts must be pasted over from the "obverse" with colored paper. Figures of the same category (that is, all triangles) should be of different shades.
- A bead or a button must be attached to all inserts in the middle with a wire element. This is necessary to simplify the use of the manual.
- It remains only to glue the finished frames to the base from Whatman paper or album sheet.
That's it, the tutorial on the study of geometric shapes and basic shades is ready. You can work with him starting from the age of one.
Pillow pyramid
Making this educational aid requires parents to have basic skills in using a sewing machine or an ordinary needle and thread.
This "pillow" pyramid is designed to teach a child to identify shades, to navigate in different sizes. In addition, the manual will help develop tactile sensations by stuffing the pillows with a variety of materials.
Required components:
 fabric cuts of various textures and colors;
- duct tape;
- stuffing material: foam rubber, buckwheat, peas, any other cereals, onion husks, etc.
 fabric cuts of various textures and colors;
From one piece of textiles, you need to cut 2 squares with sides from 5 to 12 centimeters. Please note that one pad will be sewn from two flaps of different shades. And the sides of adjacent pillows will be the same color. Let's look at an example.
At the base of the "pillow" pyramid there will be a roller with a side of 12 centimeters. Make its bottom green, and the top blue. The edges of the next pillow will be 11 cm. We sew the lower part from blue fabric, the upper part - for example, from red.
Consequently, the third pillow will already have 10 cm edges, and its bottom is made in red, while the top can be made whatever you like. The sequence and logic of actions are clear.
Velcro must be sewn onto the front sides of the pillows, and a hard piece of adhesive tape must be attached to one part, and a soft one to the other. This is necessary for the subsequent assembly of the pyramid, since the tape is a fastening element.
After that, the flaps for one pad are folded with the "obverse" sides and sewn together, but on one side you need to leave a small hole, it will be useful for us for stuffing (after filling, the open area will be sewn up).
The pad must be turned out and filled with padding. To fill the largest square, you need to use the heaviest material (for example, buckwheat) in order to give the assembled structure maximum stability.
Rough letters
To make these useful elements, you need to take:
- colored paper (blue and red);
- stencil images of letters;
- cardboard;
- glue stick;
- PVA glue;
- semolina.
To make a tutorial, you need to follow several important steps:
 On the sheets, you need to depict the silhouettes of the letters using stencils. Moreover, on blue paper there will be consonants, and on red paper - vowels. Alternatively, you can print ready-made stencils on a printer.
- The next step is to glue the leaves to the cardboard. It should be as tight as possible, for example, from a shoe box. It is better to use a glue stick for gluing.
- Then the blanks need to be placed under the press, you should wait a little for the cardboard to dry thoroughly.
- After drying, the workpieces must be cut into separate rectangles with letters. Silhouette letters are encircled with PVA glue and sprinkled with semolina. However, you don't need to use too much cereal.
- Shake off excess semolina, and then dry the cards. They are attached with pins or buttons by the corners to the cardboard so that the rectangles do not deform.
- The final touch is the application of a second adhesive layer. It is needed so that the semolina is not sprinkled during exercise. We are waiting for the cards to be completely dry.
 On the sheets, you need to depict the silhouettes of the letters using stencils. Moreover, on blue paper there will be consonants, and on red paper - vowels. Alternatively, you can print ready-made stencils on a printer.
Rough letters are used from 3 to 4 years of age. This manual is located in the language zone and is used for classes in preparation for reading and writing.
With the help of rough blanks, associations of sound and letters develop, their names are memorized, and fine motor skills are improved. In addition, the child learns to trace the letters correctly, as in the subsequent spelling.
Sensory bags
To make this Montessori didactic material, you need to stock up on:
- natural textiles (satin cuts);
- various cereals (buckwheat, millet, rice or semolina), beans and peas;
- curly pasta.
Below is a step-by-step algorithm for creating sensory bags for small children:
 Initially, fabric blanks for bags are cut out, the size can be any, but the proportions must be observed. The length of the flap corresponds to two widths of the product, you also need to add one centimeter to the seams.
- The material is folded in half with the right side inward, the sides are sewn completely and half of the upper part. You also need to secure the strings on both sides of the string.
- Buckwheat or other cereal filler must first be calcined in the oven for 20 minutes or in the microwave for 3 minutes. This is done in order to avoid the development of bugs in the future.
- The bags are turned inside out and ironed. Then filler is poured into them, it is important to ensure that the weight of all benefits is the same. Also, do not put several types of cereals into the bag at once.
- The final touch is the top stitching to the end. All extra sticking out threads are cut off and given to the child for a fun game and development.
 Initially, fabric blanks for bags are cut out, the size can be any, but the proportions must be observed. The length of the flap corresponds to two widths of the product, you also need to add one centimeter to the seams.
You can also create bags in the shape of a funny caterpillar. To do this, you need to cut off the required length from the tights, fill it with, for example, buckwheat, tie a knot to get a ball that is dense to the touch.
Then another type of cereal is poured and the knot is tied again. This step is repeated with each type of filler. After that, the tail of the caterpillar is stitched and the resulting toy is beautifully decorated. For example, for a peephole, you can take beads, only they need to be sewn tightly.
Such a manual is suitable even for the smallest child. It perfectly develops sensory sensations, fine motor skills, attentiveness. In addition, the use of sensory sacs allows you to effectively develop auditory perception.
Mobile
The Maria Montessori technique also involves the use of suspensions for newborn babies and older children. Such devices differ from industrial versions in the absence of musical accompaniment, rapid rotation of elements.
 Most often, forms are taken abstract, rotation occurs due to the air in the room. Such a leisurely move will surely please the child, who will track the movement of the toy, focusing his gaze.
The popular suspension model is the hexagonal mobile. To make it you need:
- light stick made of wood;
- 3 sheets of cardboard in basic shades: yellow, red and blue;
- glue;
- ribbon.
To make this educational tool for babies, you need to follow several steps:
- A hexagon pattern is drawn on the cardboard. You can also make a printout on colored paper and stick it on a cardboard. Dry thoroughly.
- The folds are processed with scissors and a ruler to avoid creases and unnecessary folds.
- Then the hexagonal reamer is cut out and assembled into a shape, glued together at the joints. This is repeated 3 times.
- The ribbons are fixed in one of the seams of the product and tied with the other tip in a stick made of wood. It is important that it is free of roughness and burrs.
- The finished mobile is fixed at a distance of 25 - 30 centimeters above the child.
A similar allowance is offered to children from 3 months of age. It will teach the child to focus his eyes on rotating objects, track them, perceive their shades and shape.
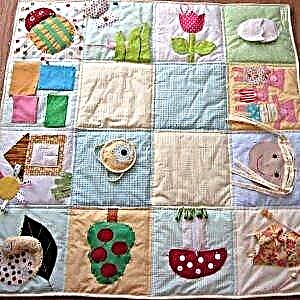
Touch pad
Such a coating, of course, can be purchased in the store, but you can also make it yourself. Remnants of old clothes and various accessories will do:
 textile rags;
- hooks;
- buttons;
- lightning;
- Velcro;
- buttons;
- other fasteners.
 textile rags;
Initially, you need to sew a blank for the sensor mat, the size and shape can be any. You can fill the base with padding polyester. If you don't feel like messing around, experienced mothers advise you to take an old bike blanket.
Further creation of the rug will depend only on mom's imagination. A touch-sensitive coating usually combines textiles of different textures, patch pockets with fasteners, sewn-in tweeters, balls with various fillings, etc.
This developmental material contributes to the development of children's sensing from the age of 8 months. Also, the child will develop fine motor skills, learn to use different fasteners, which is extremely necessary for self-care skills.
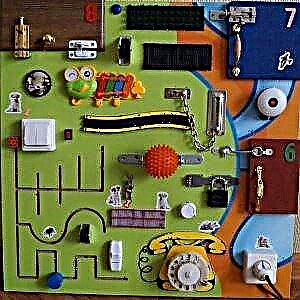
Busyboard
This is the modern name for Montessori stands, which are development boards to which everything that the child is usually strictly forbidden to touch is attached. With the help of the boards, children can safely familiarize themselves with household items.
Making a business board will require a little imagination from parents and the following devices:
 chipboard board;
- self-tapping rods;
- adhesive agent;
- locks with keys, chains;
- on / off switches;
- sockets;
- disk element from an old phone;
- window latches;
- fasteners;
- buttons;
- lacing, etc.
 chipboard board;
The development board is made quite simply. On a sheet of chipboard, you need to draw a diagram of the future business board, you can even act in accordance with a certain plot.
The parent lays out the parts, and then screws them very tightly to the board with self-tapping screws. The fastening strength is very important, since the child will try to tear off the element of the manual he likes.
For more information on how to make a business board with your own hands and what devices you need for this, read the article of the children's doctor.
This didactic material is suitable for children from one year old to 6 years old. A child who is already sitting and walking will be able to independently study objects and interact with them: open and close locks and fasteners, use sockets, work with lacing.
Such a homemade business board develops fine motor skills, attentiveness, and perseverance. The child learns how to solve everyday difficulties, and also satisfies the interest in everyday objects. He especially likes the variety of elements.
Multicolored hedgehogs
This is the simplest didactic material possible. Mom cuts out silhouettes of a hedgehog or any other figures from bright cardboard. You can also use regular corrugated cardboard decorated with self-adhesive foil.
 The most common option is a hedgehog, which can be used to complete the "needles" with the help of hooks. Also, parents make the sun from cardboard with clothespins, various animals and men. Additionally, these figures are painted with felt-tip pens or paints.
If the clothespins are taken to match the color of the outline, then the child will not only develop fine motor skills, but also learn the basic shades. For example, yellow clothespins are suitable for the sun, green clothespins for a Christmas tree, and blue for a blue cloud, respectively.
As a conclusion
Thus, the Maria Montessori technique at home is also quite feasible. First of all, you should equip the space in accordance with certain requirements for the zoning of the room and didactic materials.
Many developmental aids can be made by hand using available tools. This will save money and realize your own imagination. And the child will play with homemade toys with great pleasure.
In addition, children, seeing the interest of their parents and their enthusiasm, will themselves light up with the knowledge of the world around them. And when the baby grows up, he himself will begin to take part with pleasure in the creation of new unusual play accessories using the Montessori method.